How to create a group
A group keeps every shared expense for a trip, a flat or a couple in one place, with a running balance for each person. You can create one and add your friends in a single step.
- 1
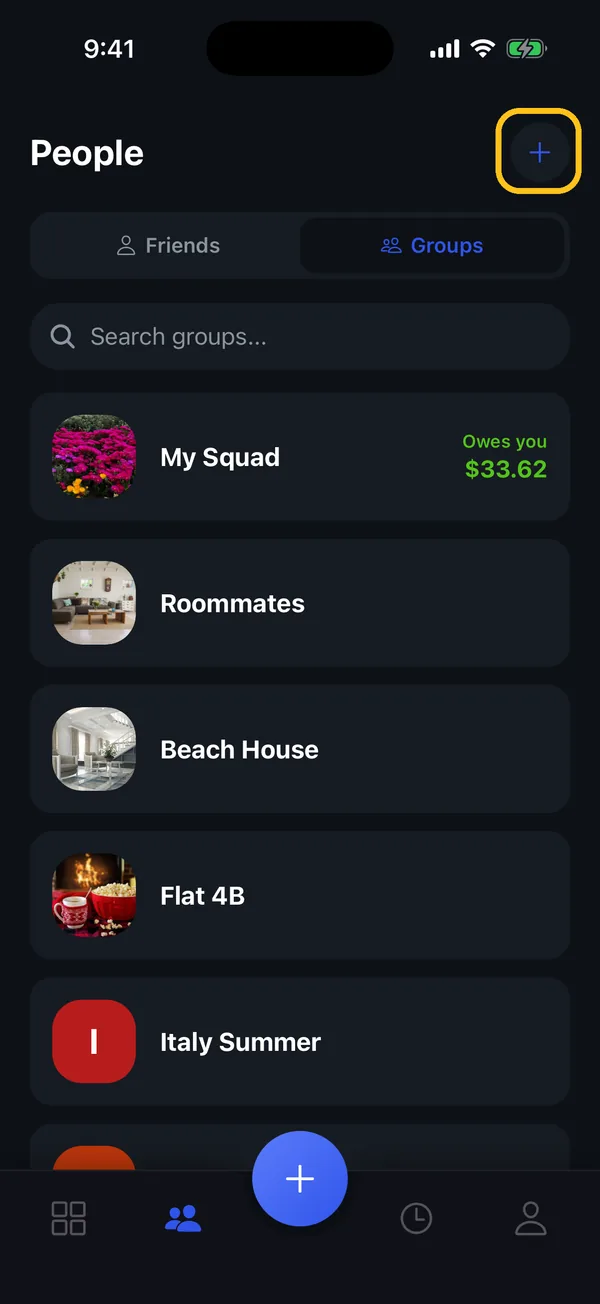
Open Groups and tap +
Tap People in the bottom bar, switch to Groups, then tap + in the top-right corner.
- 2
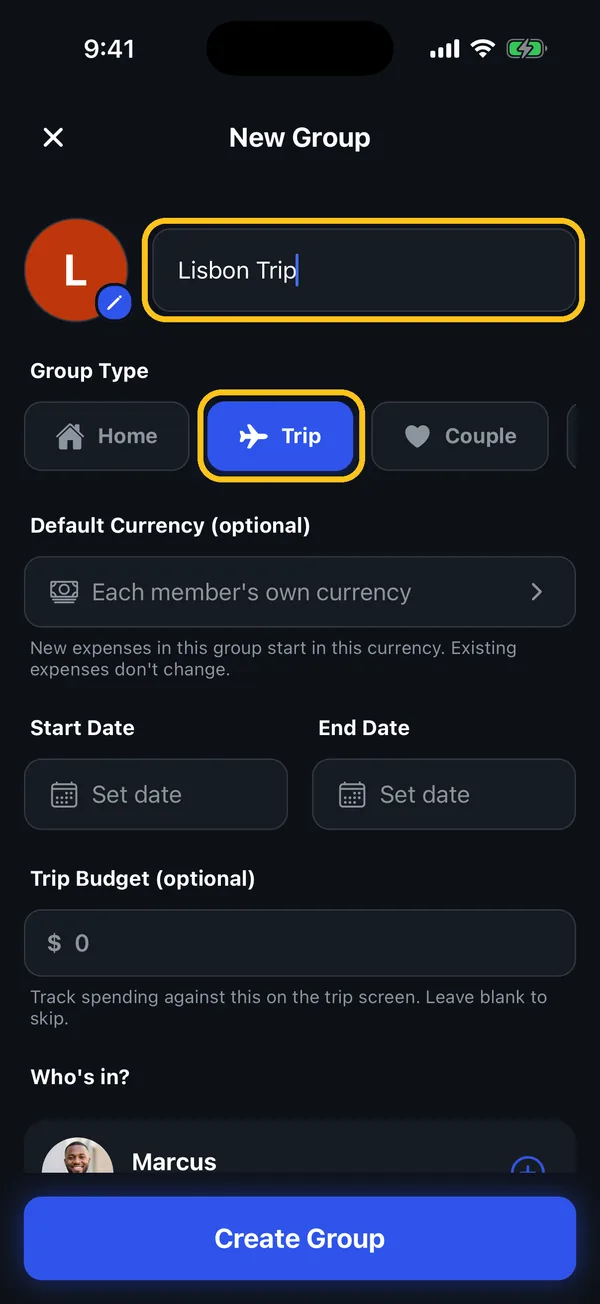
Name the group and pick a type
Give it a name and choose a type: Home, Trip, Couple and more. Trips can also have start and end dates and an optional budget. You can set a default currency so new expenses start in it.
- 3
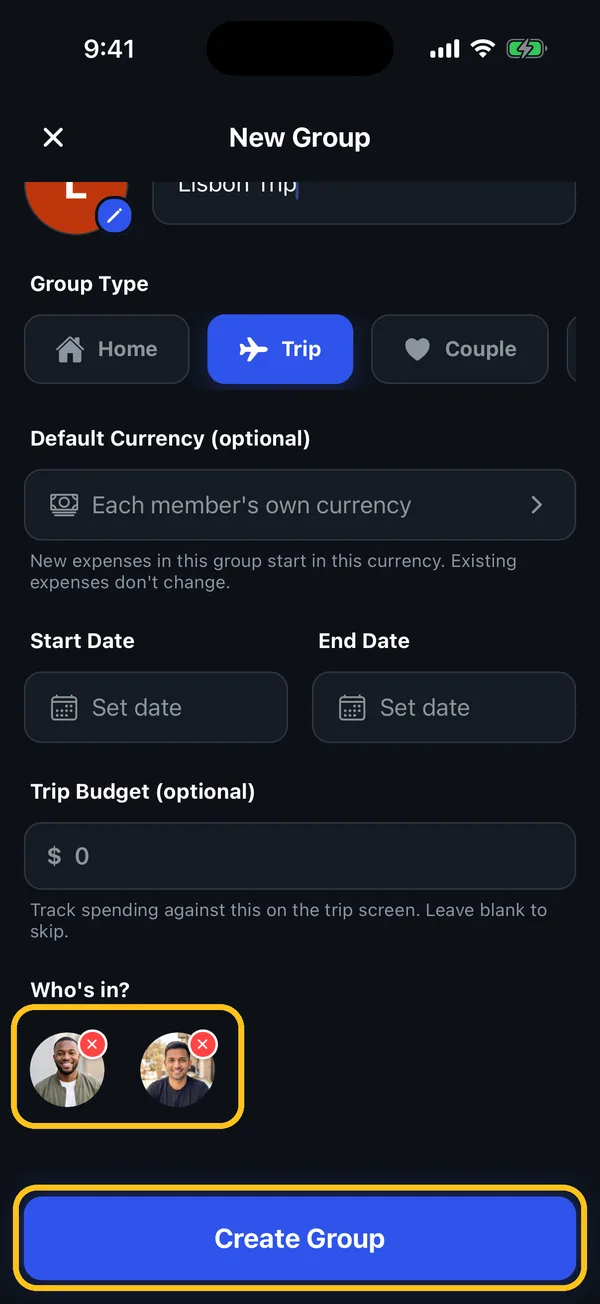
Choose who's in, then tap Create Group
Scroll to Who's in? and tap + next to each friend. They appear as photos at the top of the list; tap the red × to remove someone. Then tap Create Group.
- 4
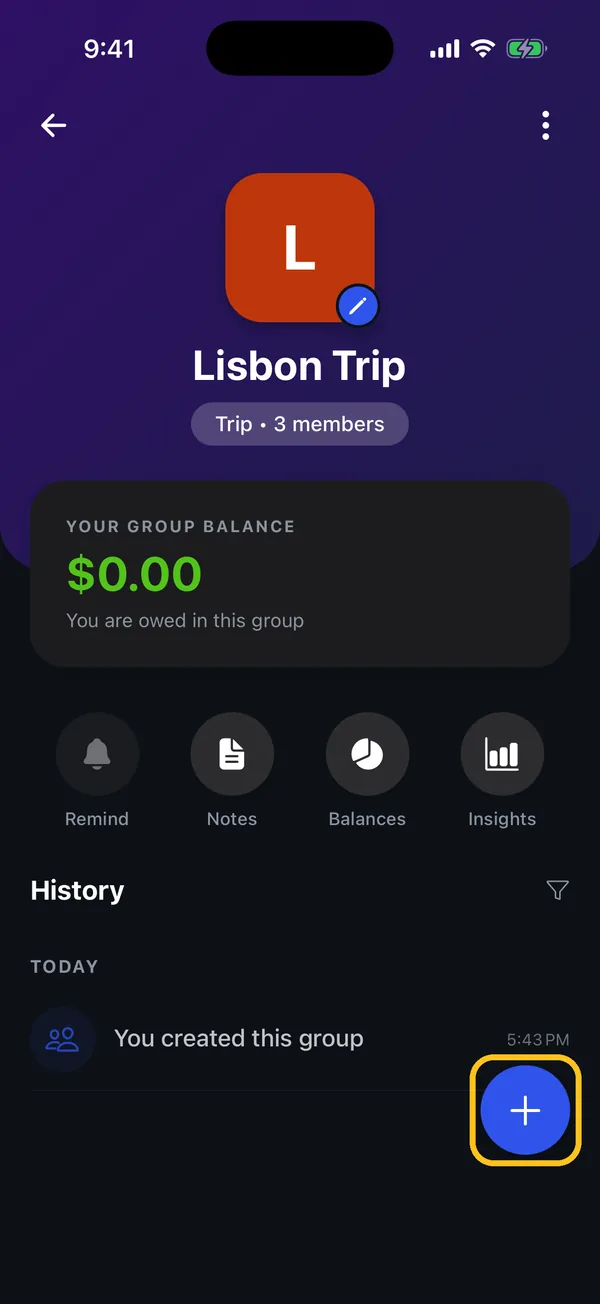
Start adding expenses
Your group is ready and everyone in it can see it. Tap the blue + to add the first expense.
Friend not in the Who's in? list?
Only people you're already connected with appear there. Add them as a friend first, then add them to the group at any time from the group's menu.
Something not working?
Can I create a group before my friends join?
Yes. Create the group now and add people later from the group's ⋮ menu → Add people to group, once they've joined Cost Share and you're connected.
Is there a limit on groups?
No. You can create unlimited groups with unlimited members, free.
Can I change the name, photo or type later?
Yes. Open the group, tap ⋮ in the top-right corner, then Edit Group details.
Still stuck? Contact support — we'll help you personally.